

How To Transfer A Photo To Wood
How to Transfer Photos onto Woods
I love finding new means to display photos, especially in this super digital world we live in. Then, let me show you how to brand these gorgeous lilliputian photograph rounds. The whole process is actually fun and intriguing, and it'due south a peachy project to do with the kids.
I've used rough-cut wooden rounds, which give quite a charmingly rustic issue. But yous could also endeavor this method with groomed wooden blocks, for a more modern look
The trick for how to transfer photos onto forest is using Mod Podge, which is a pretty cool arts and crafts glue. Information technology has loads of dissimilar uses, and this photo transfer project is 1 I've been wanting to try for ages.
Read on to acquire how to brand these photo rounds, and for lots of tips and tricks, I learnt forth the way. Plus some ideas on how to display and use them :)
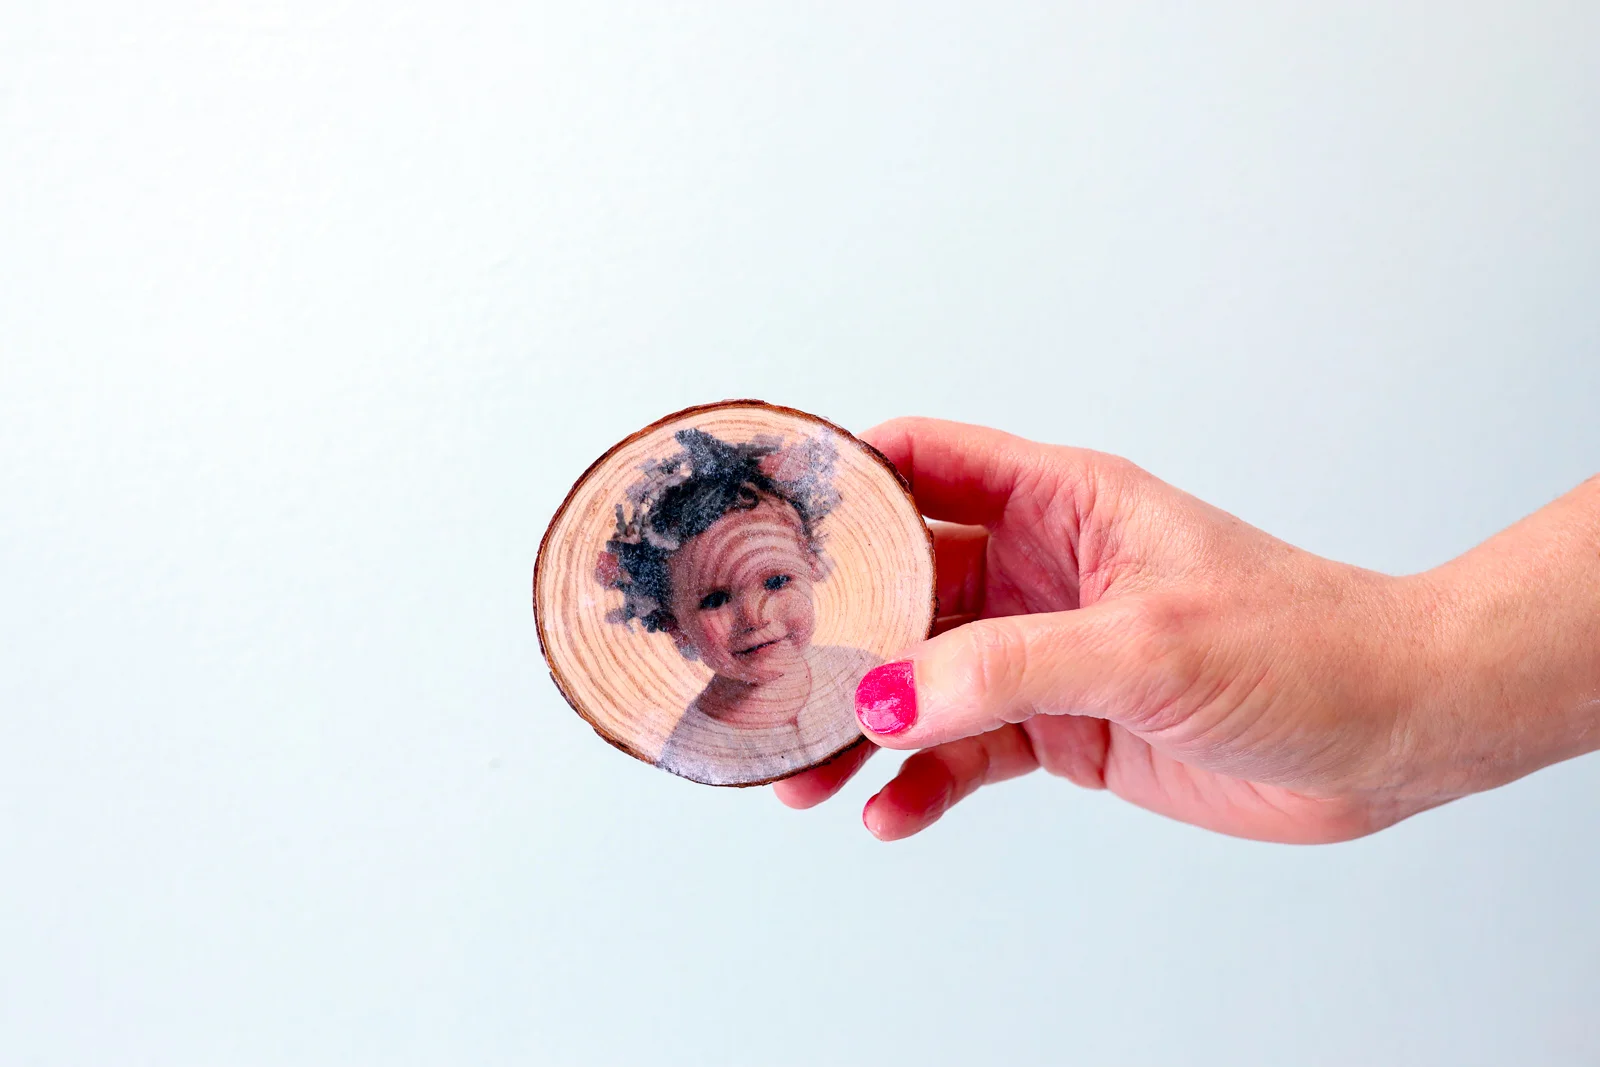
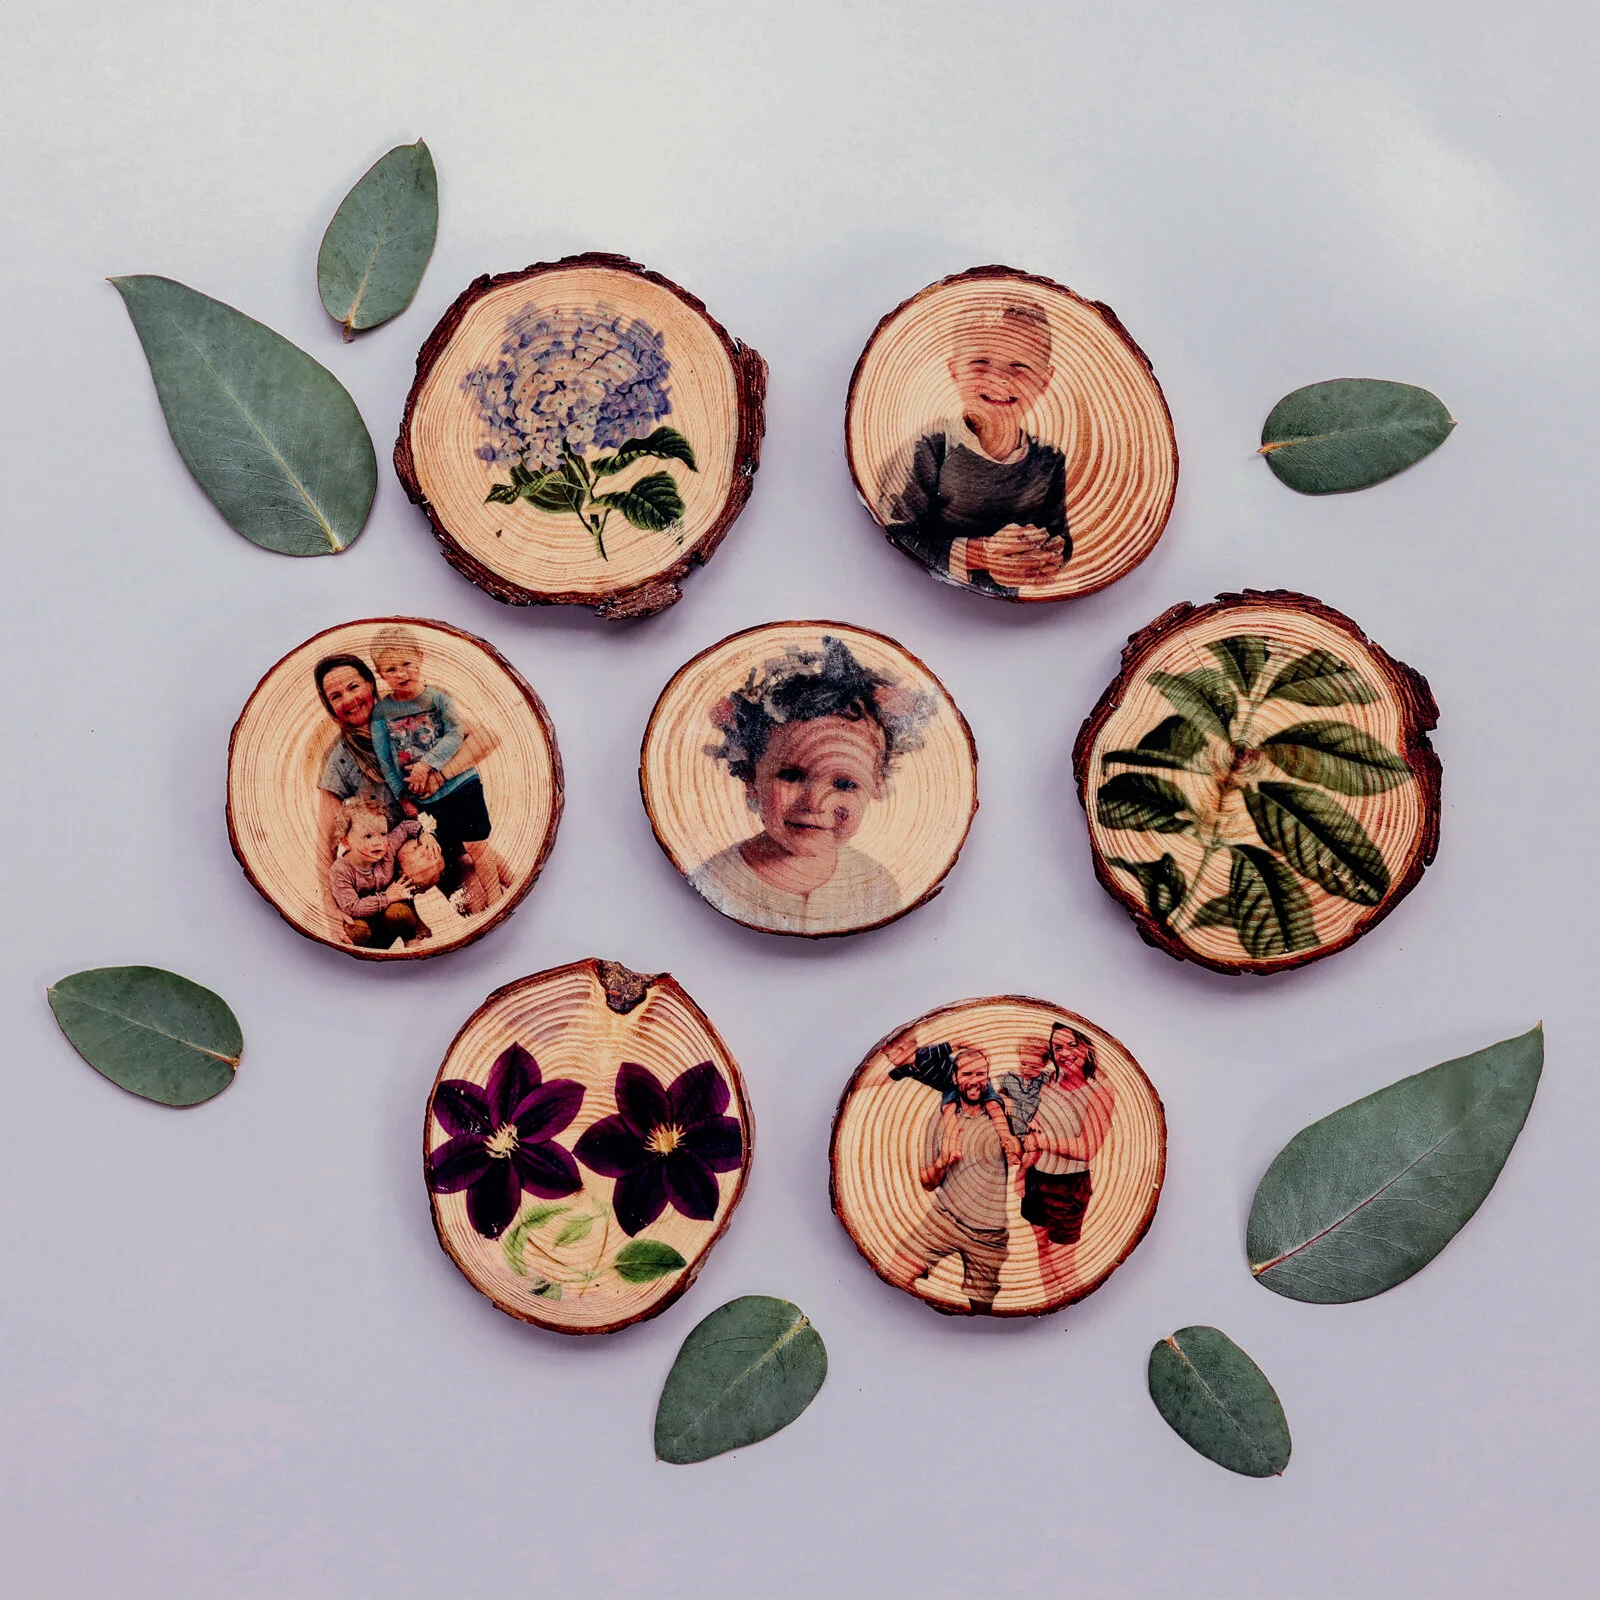
Who knew mod podge photograph transfers could look this skillful?
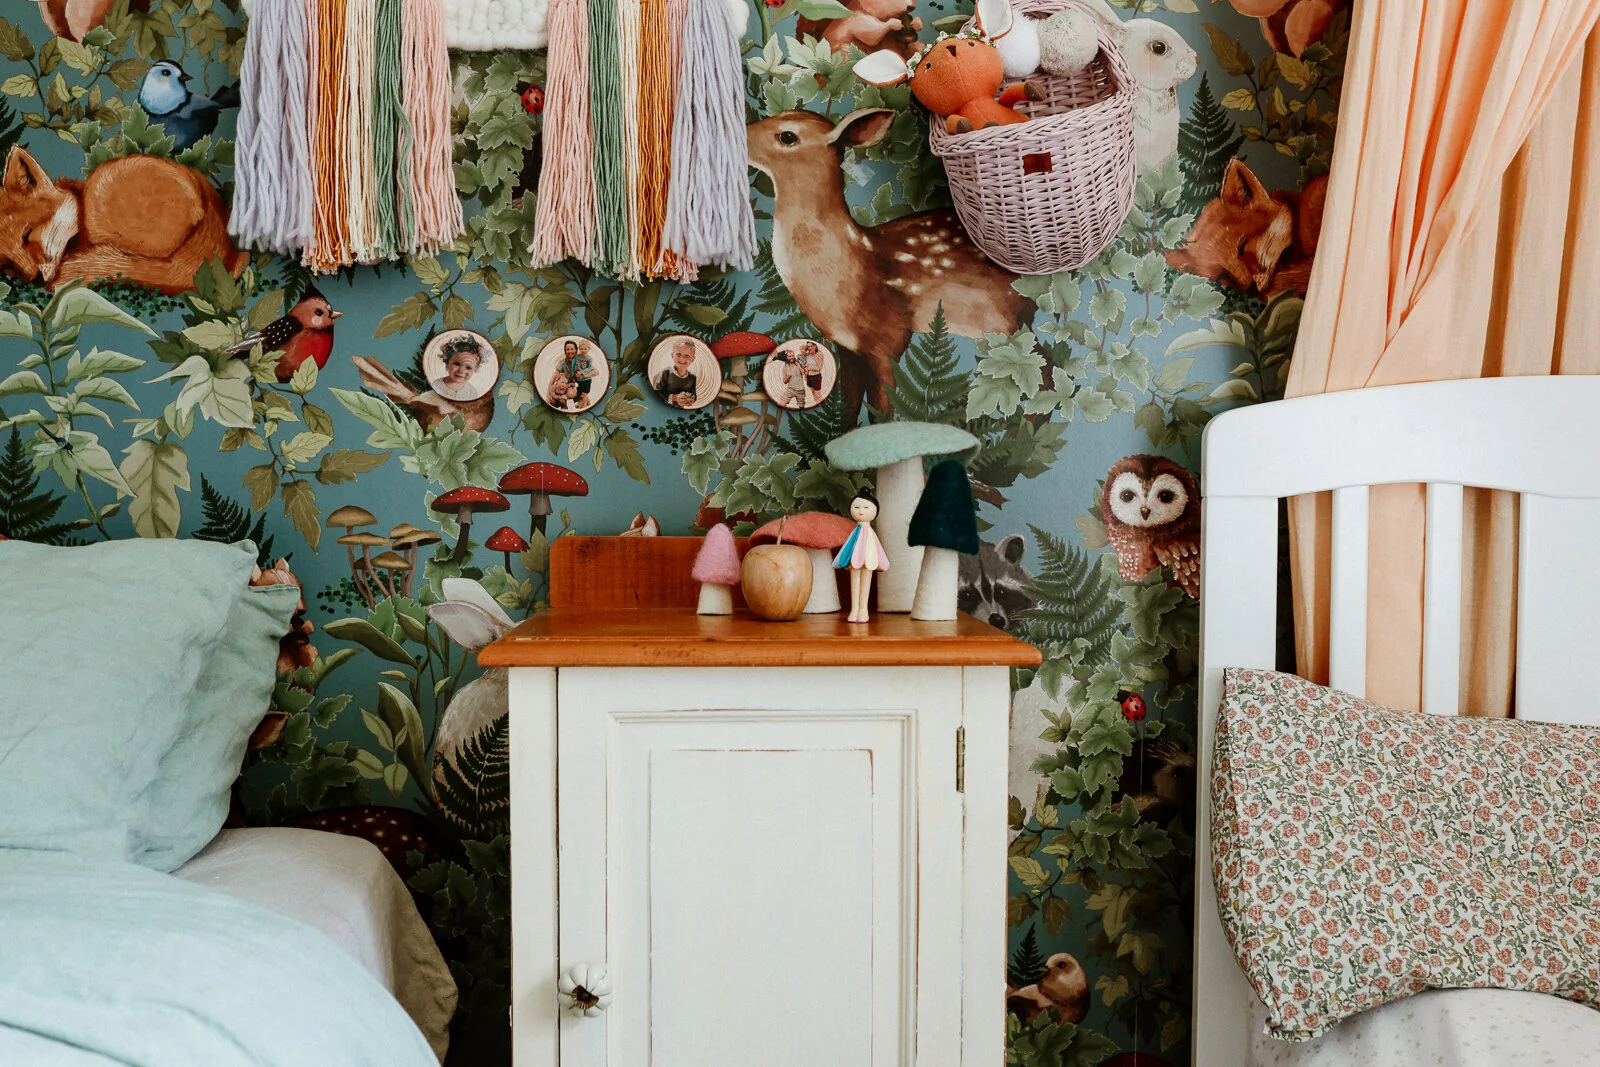
Don't they look cool displayed on the wall in the kids room?

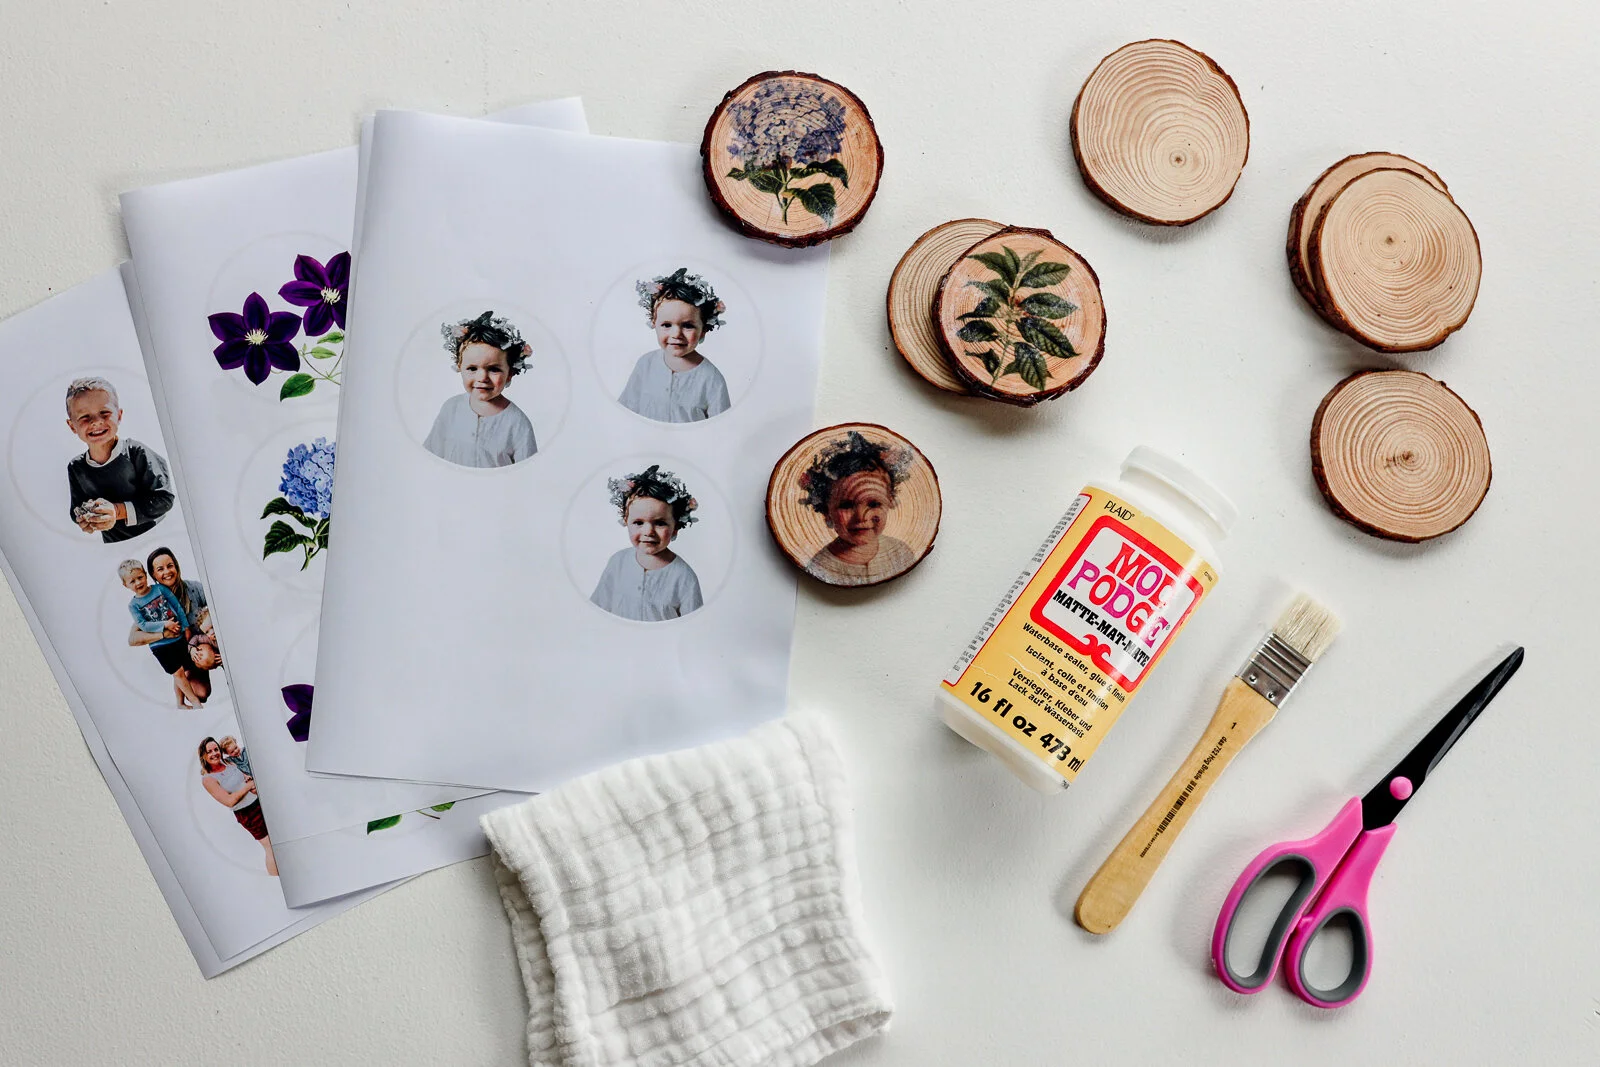
You will need:
-
Mod Podge – I used the manifestly Matte version
-
Images which you've printed using a laser printer
-
Wooden rounds – they need a smooth surface
-
A brush
-
Scissors
-
Cloth
-
Bowl of water
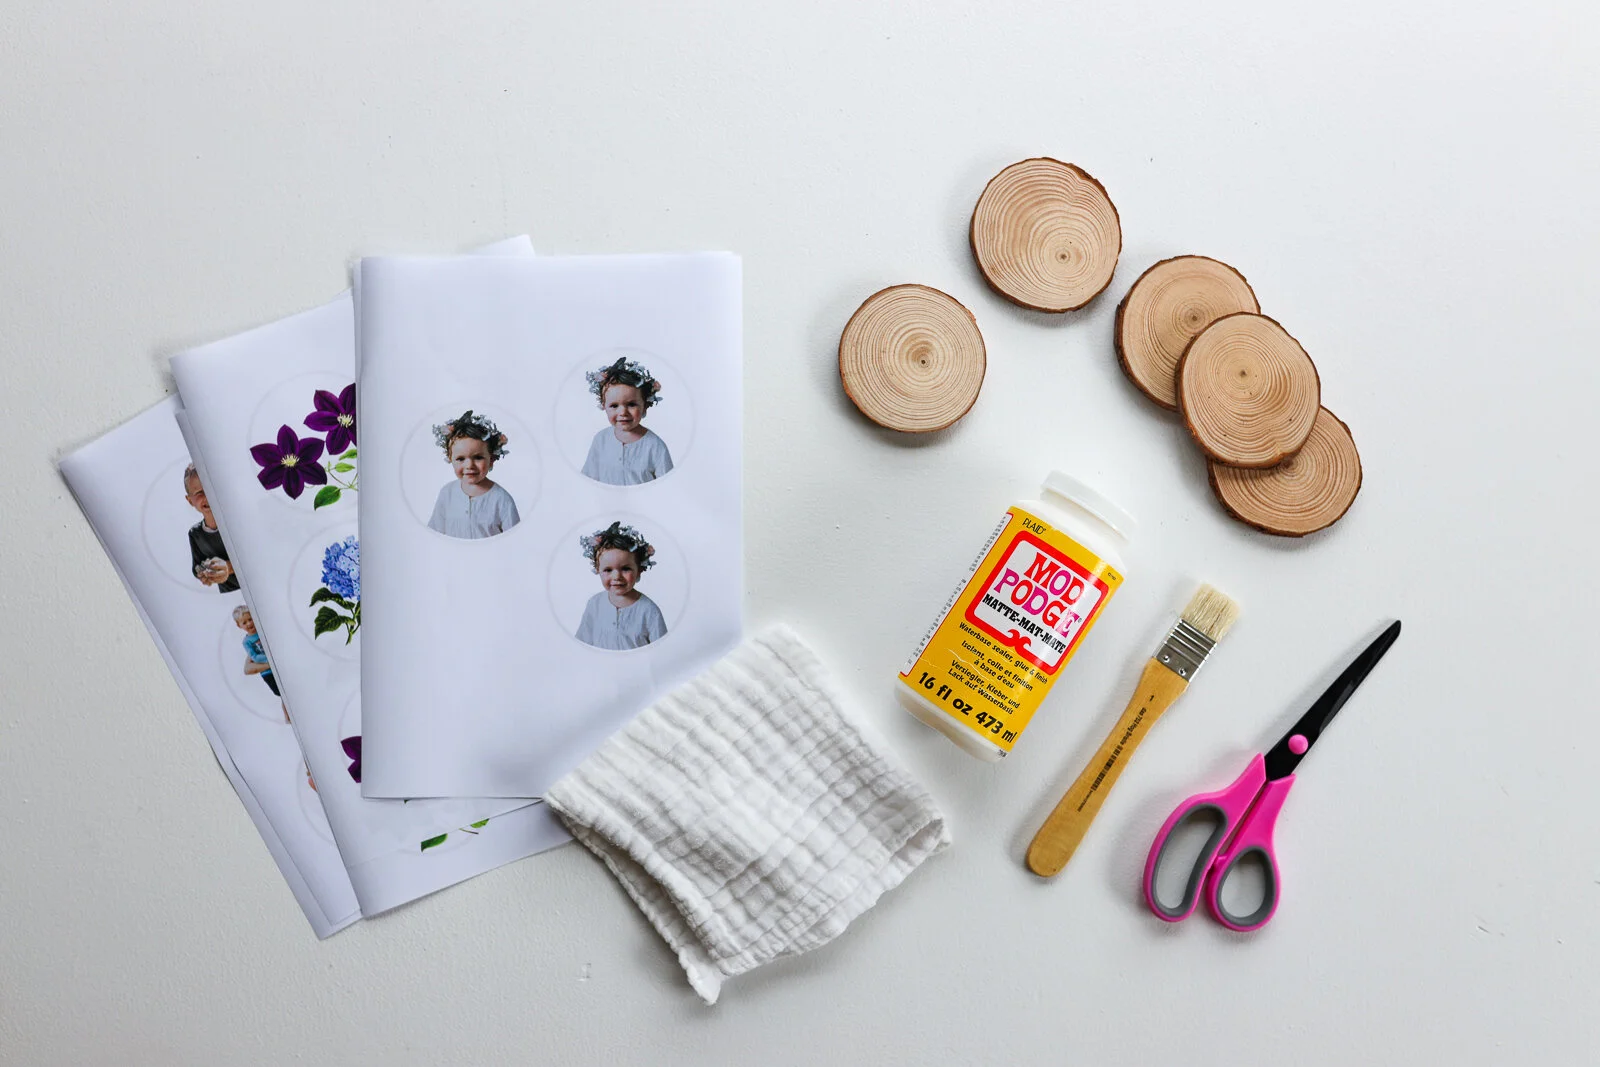
You can get all of these supplies from my partner Warehouse Stationery!
Step Ane
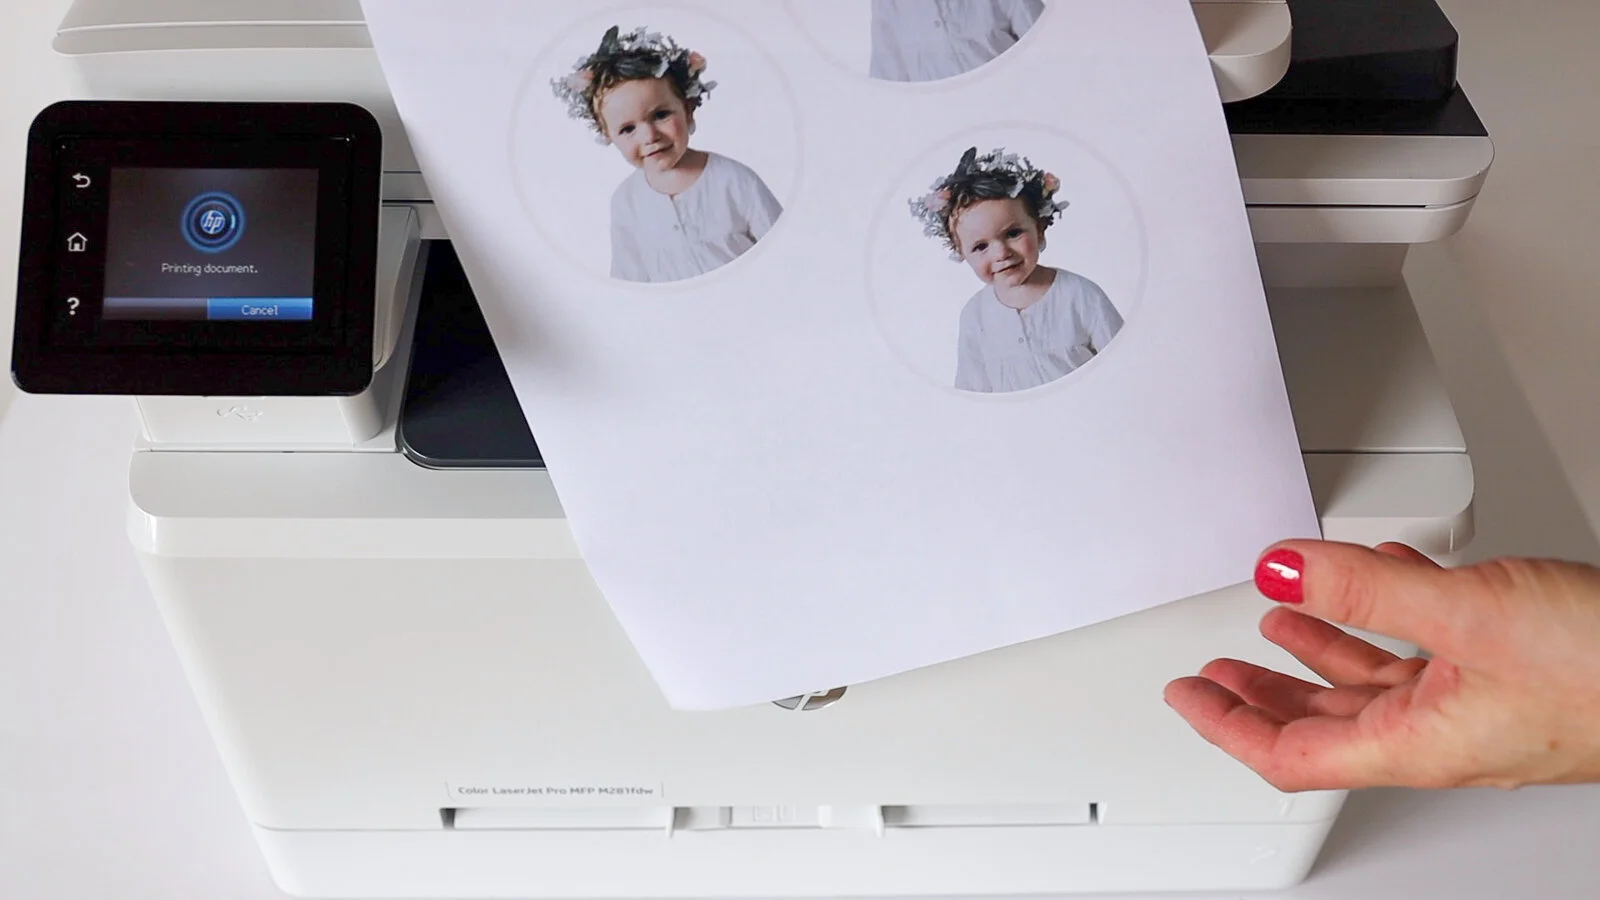
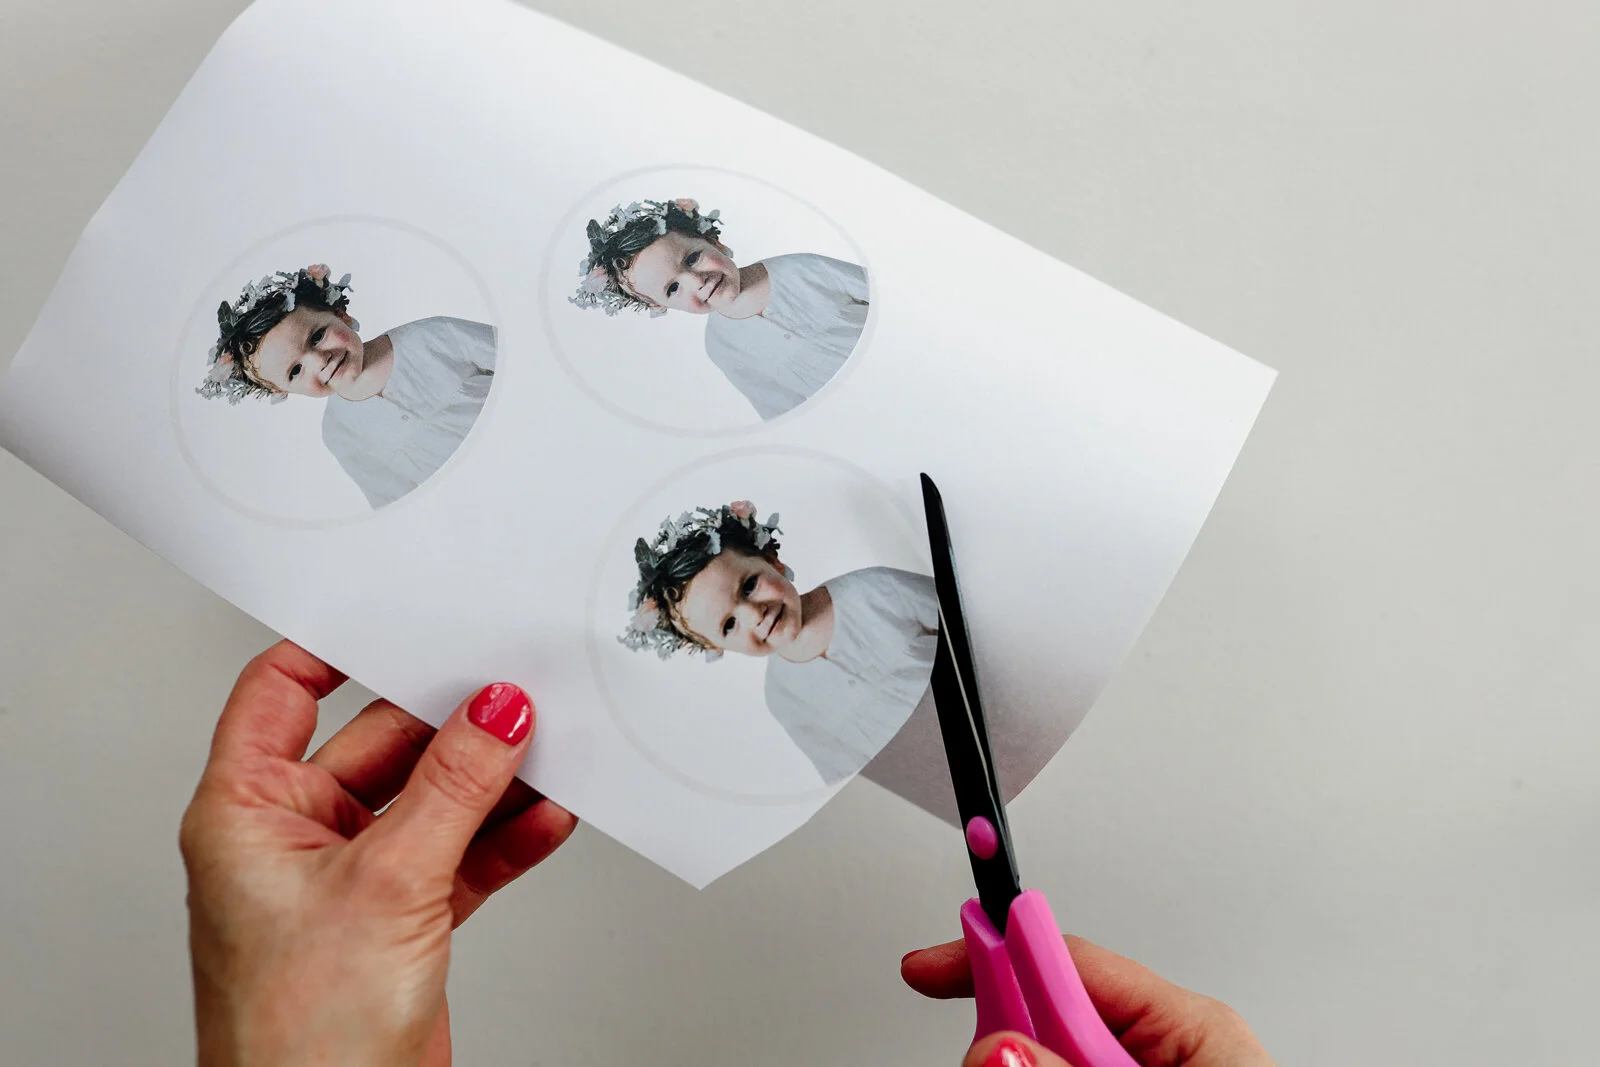
Print your photos with a laser printer, onto normal paper (not photo paper). It'south really important you use a laser printer not an inkjet printer.
Note that your photo will exist revealed in opposite on the wood, so if it has words or a style that needs to face up the original way, then flip it digitally before you print. You can use an app like Canva or PhotoGrid to do this.
Make sure yous size the photos so that they will print out and fit onto the wooden rounds. I actually used Canva to create a page of circular images, just you could just print and trace suitably sized circles over the tiptop of each image, then cut them out.
Tip: any white areas on the photo will finish up relatively clear, with the wood showing through.
Footstep Two
Cut out the photos, so that they are ready to fit onto the wooden rounds.
Footstep Three
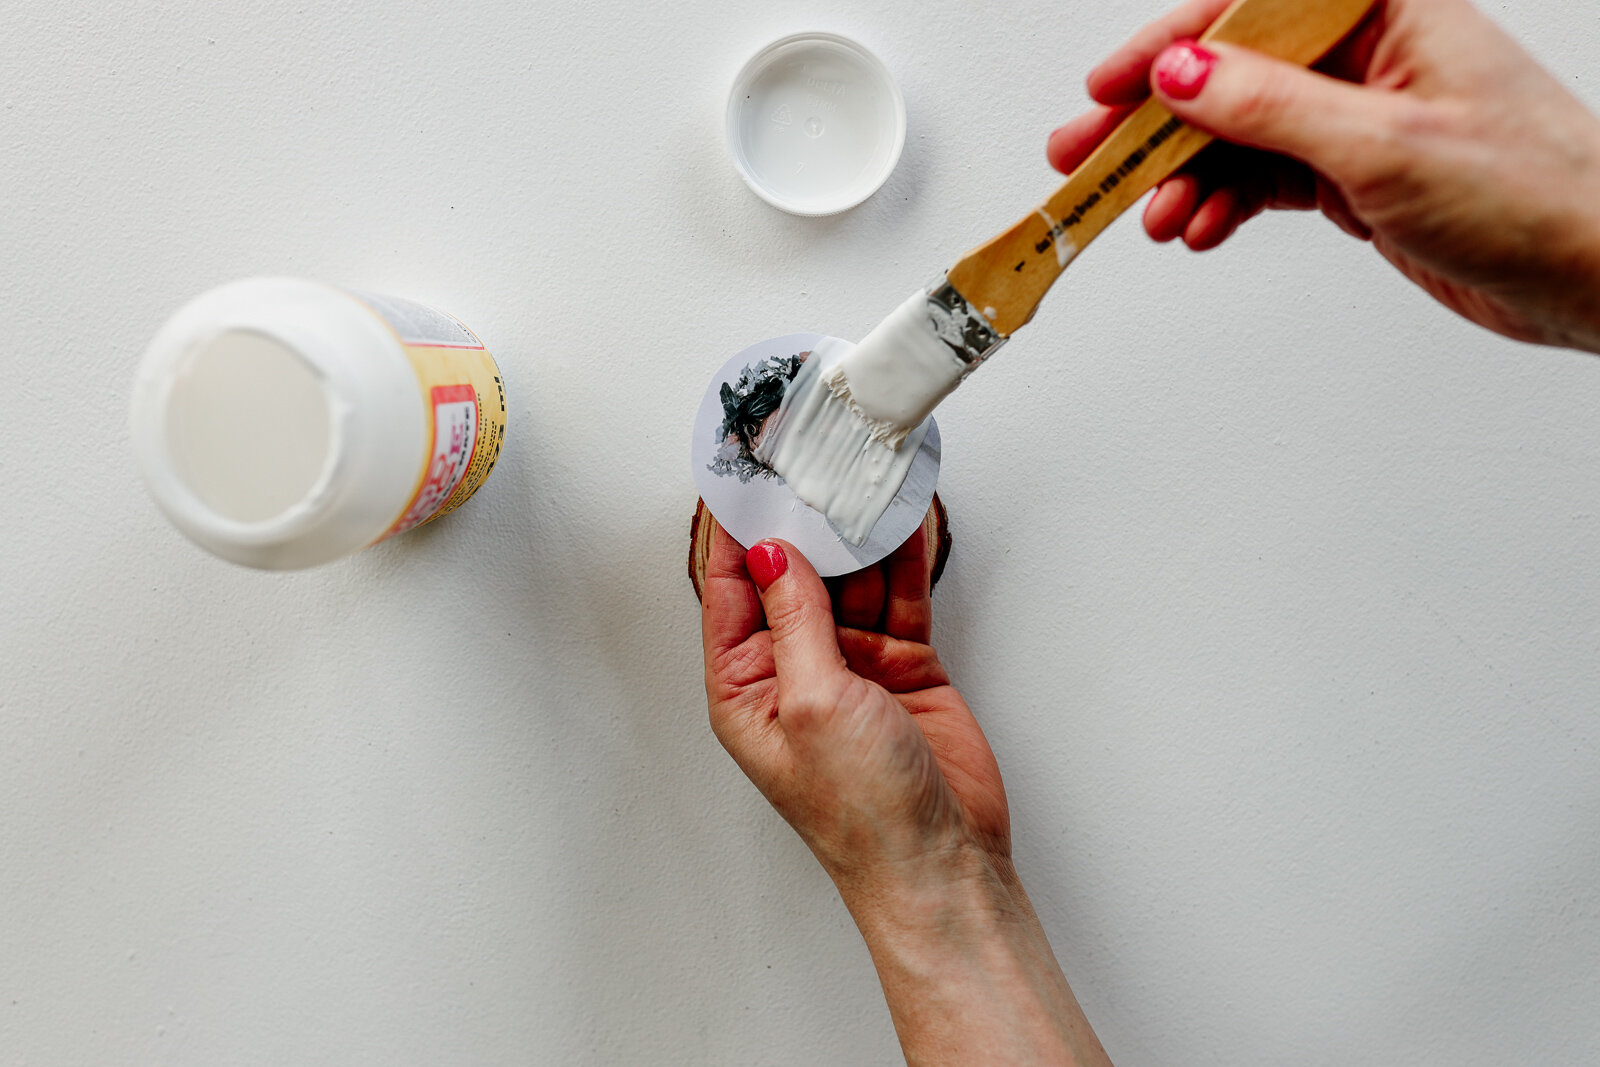
Paint a thin even layer of Modernistic Podge over the image, on the printed side. Then lay it face up-down on the wooden round, and gently printing it into place.
Tip: Endeavor non to get Modernistic Podge on the top of the image - when information technology squeezes out the sides wipe information technology off, rather than spreading glue over the acme.
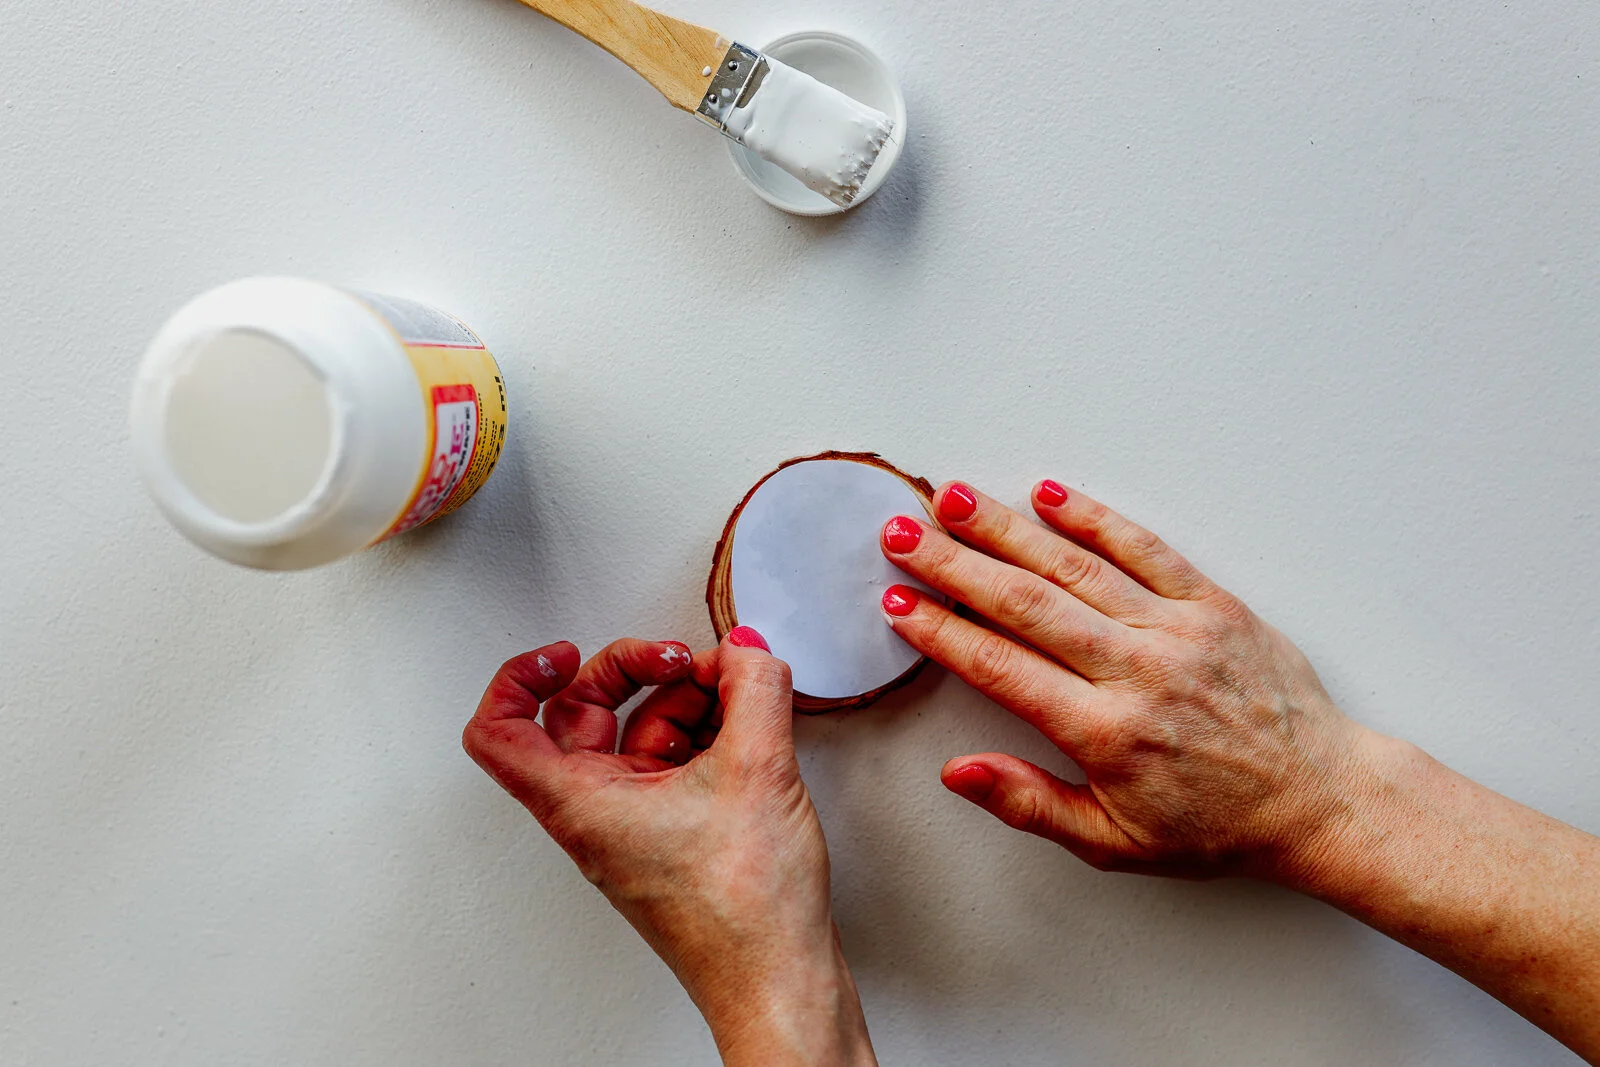
Footstep 4
Look 24 hours for the photograph to fully dry onto the forest. If you're super impatient you could try using a blow-dryer to dry it – I tried this with mixed results (some turned out fine, some didn't).
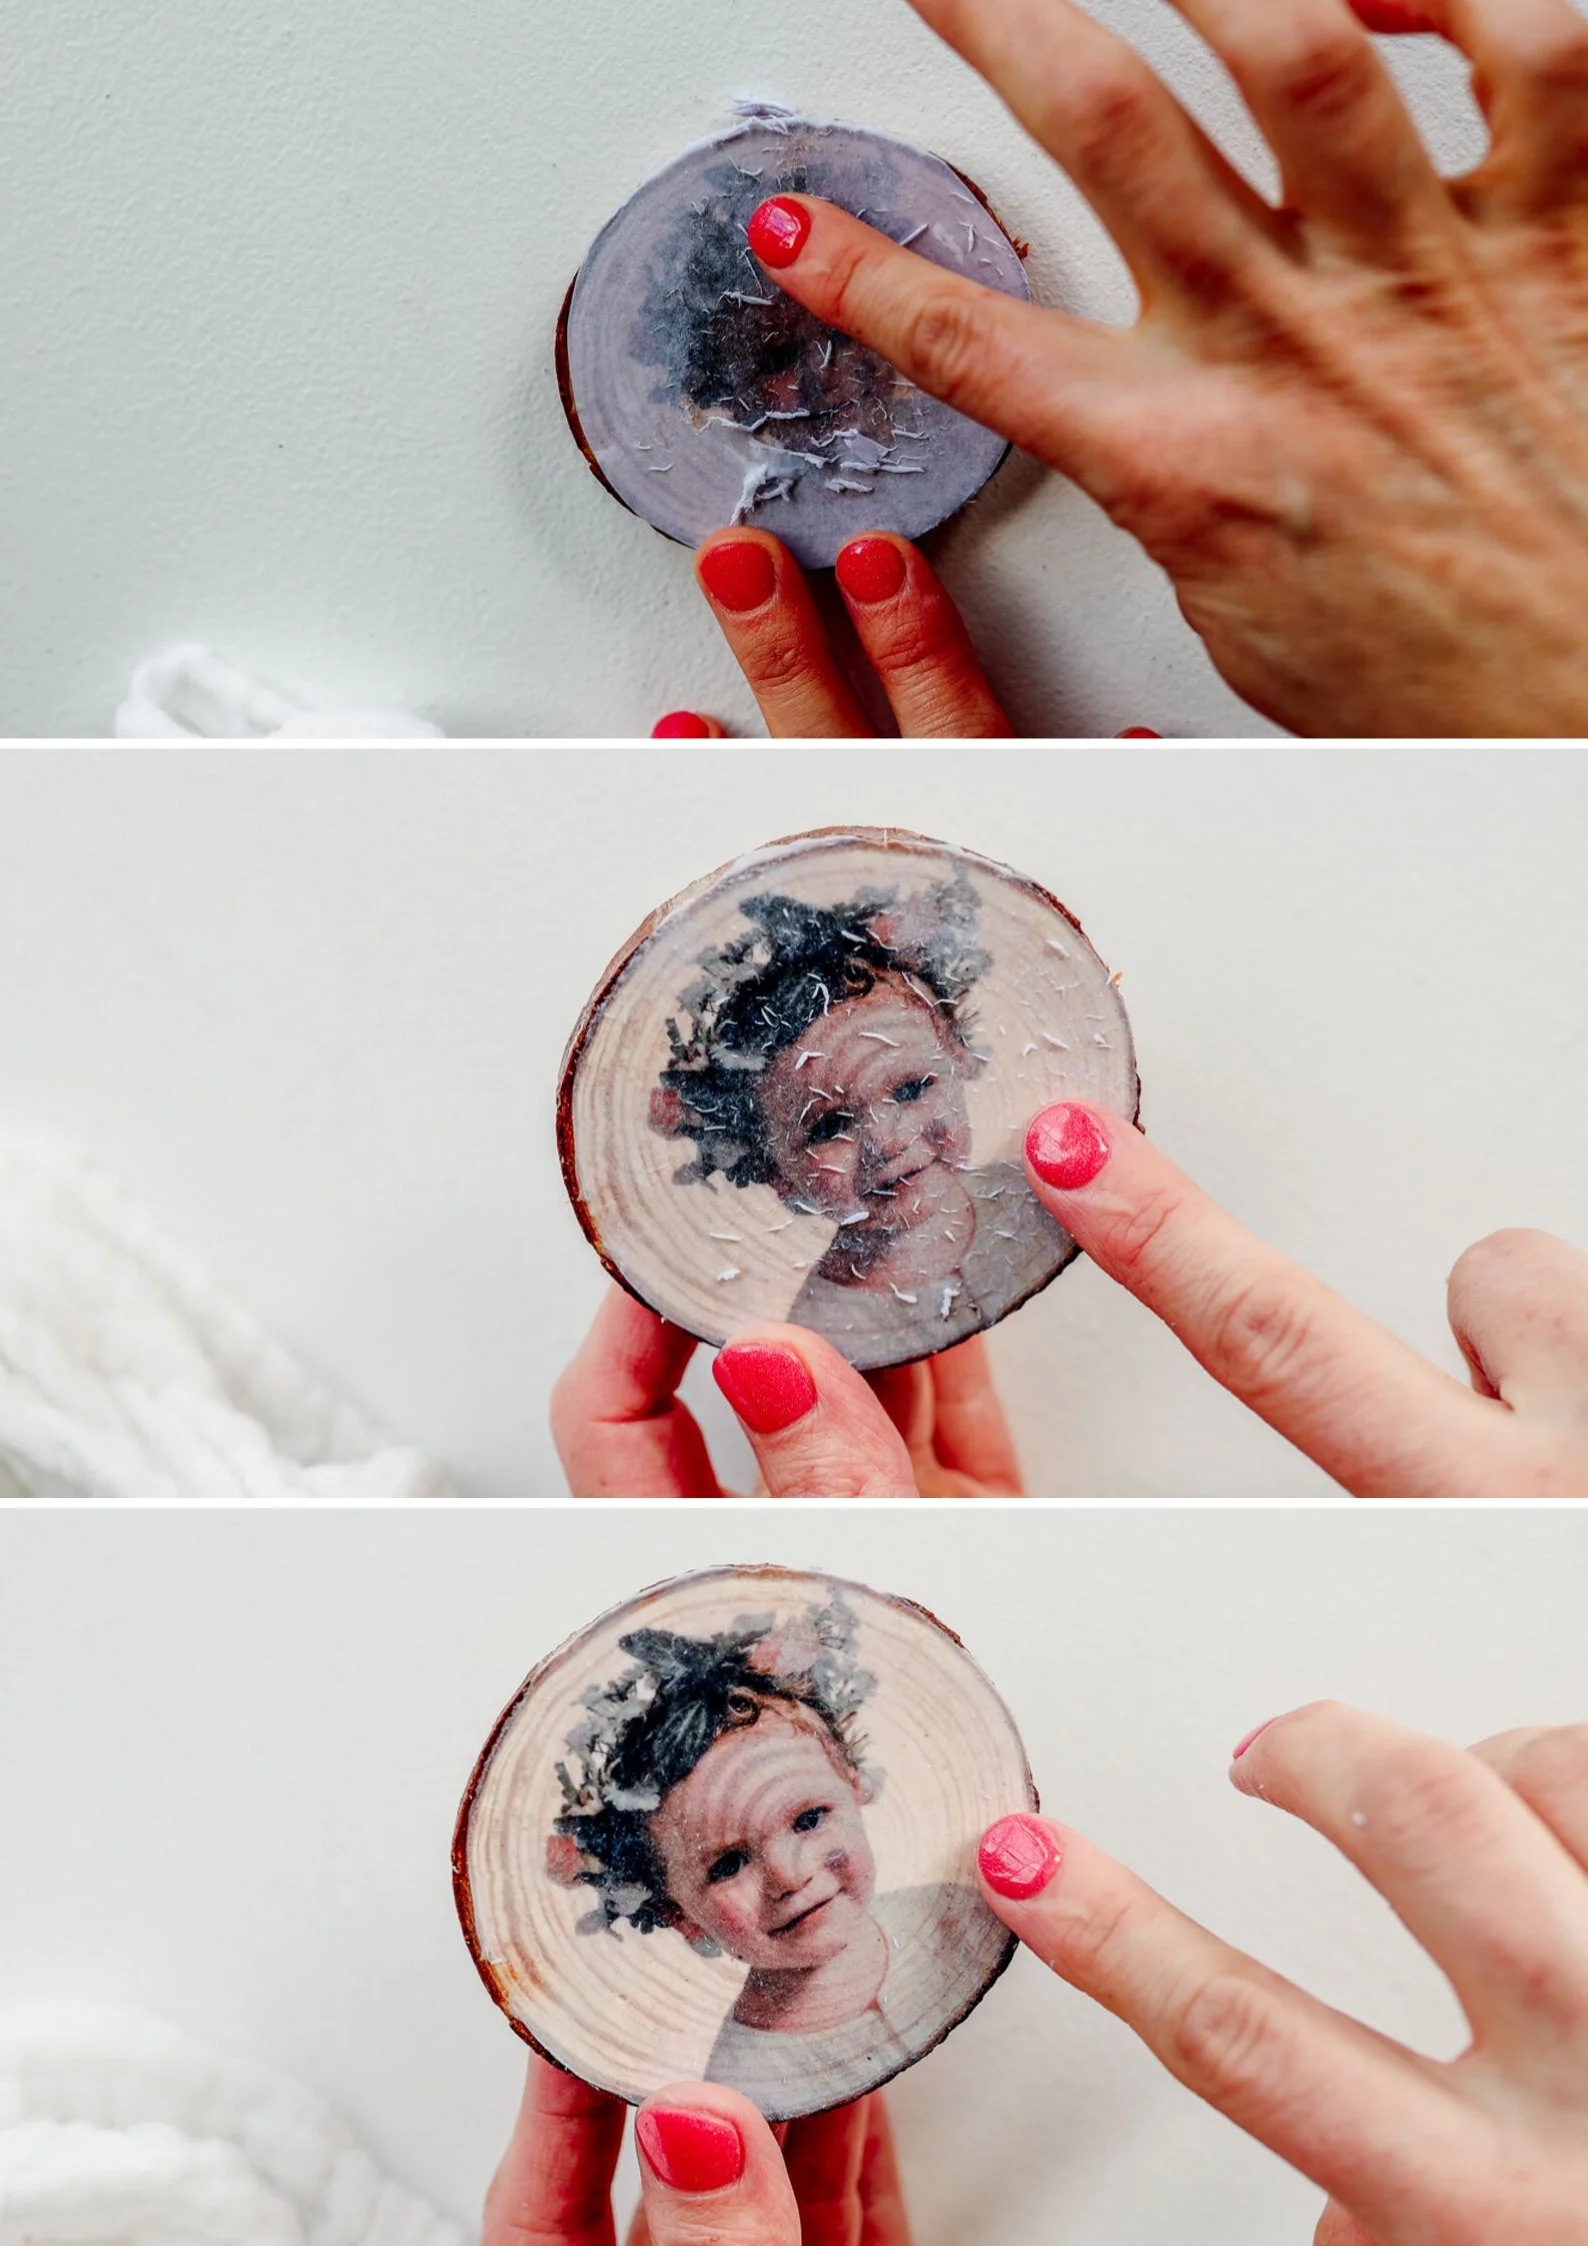
Step Five
Grab your textile and bowl of water, and dab the wet fabric on the image, and so that the paper gets quite saturated. Yous don't want to totally dunk the wooden round in the water, but y'all'll need it to exist pretty soaked.
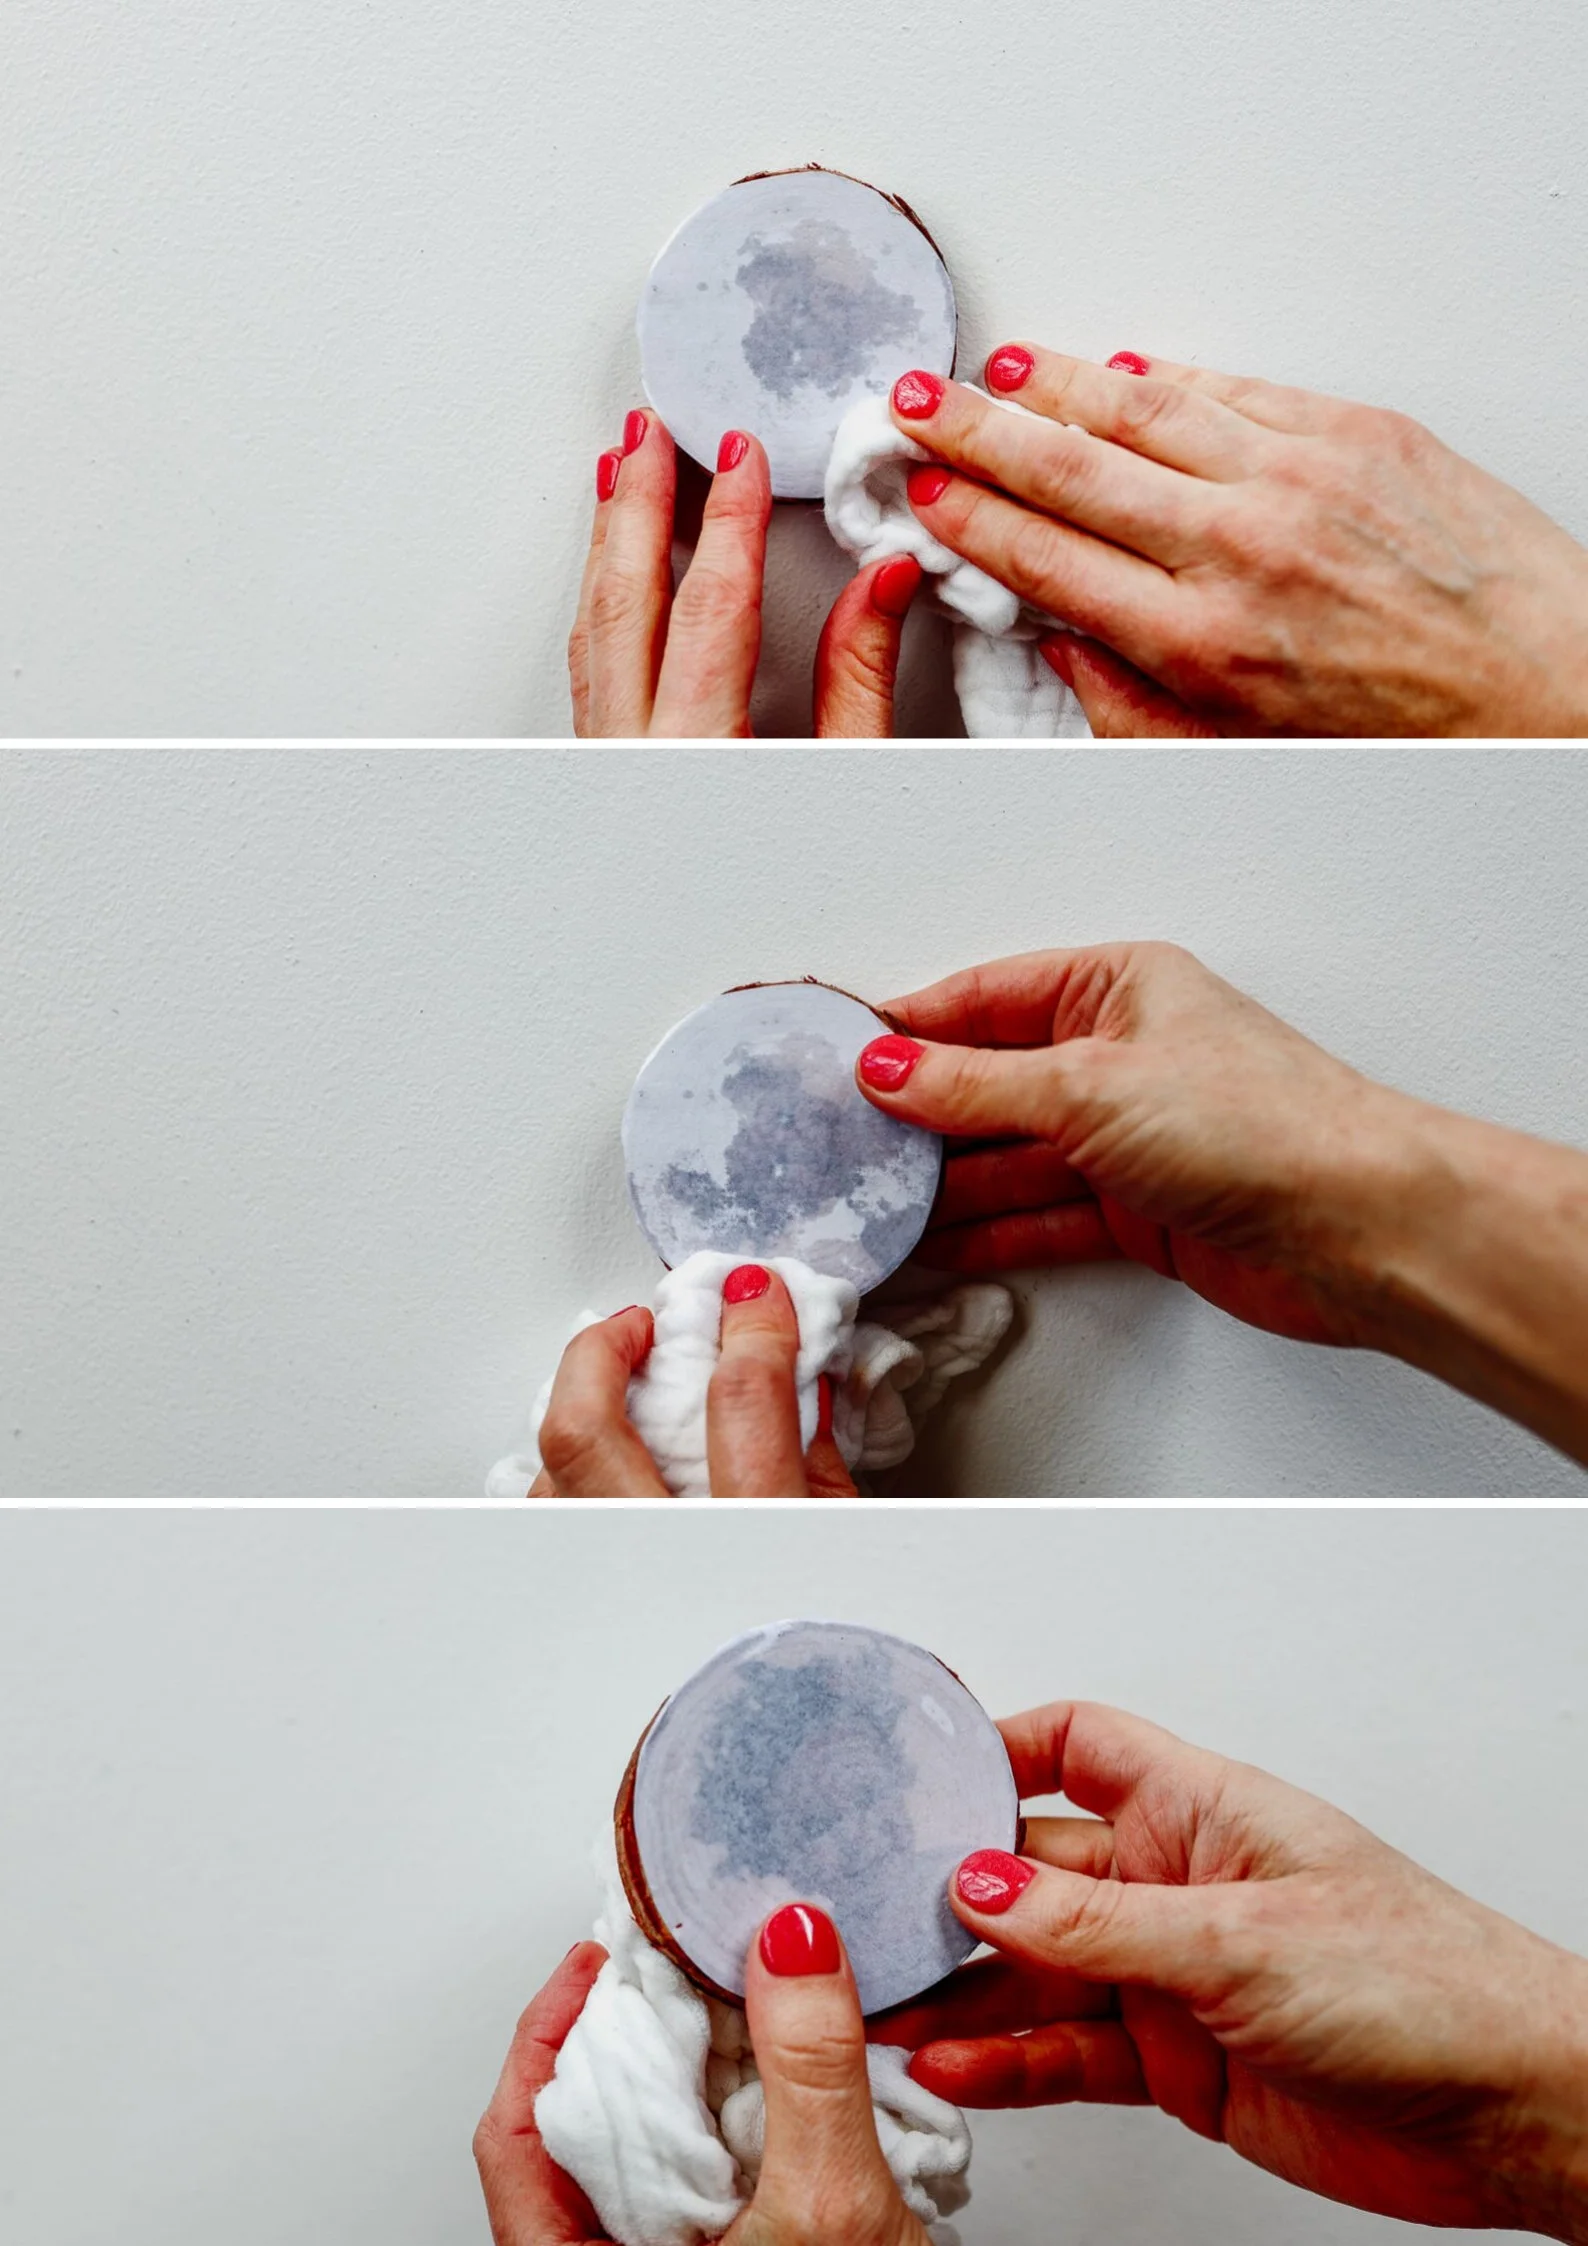
Now slowly rub off the top layer of white newspaper. I used the friction of my fingers, so I could be as precise as possible. Don't rub too hard or y'all might by mistake rub off the lesser layer which is the printed image (I learnt that the hard way!).
Keep rubbing off the paper, and dabbing on more water to help it lift off. The more patient y'all are, the better finish you volition get
Now expect for information technology to dry. If you lot can meet leftover paper which dries white, then take some other go at wetting and rubbing it off.
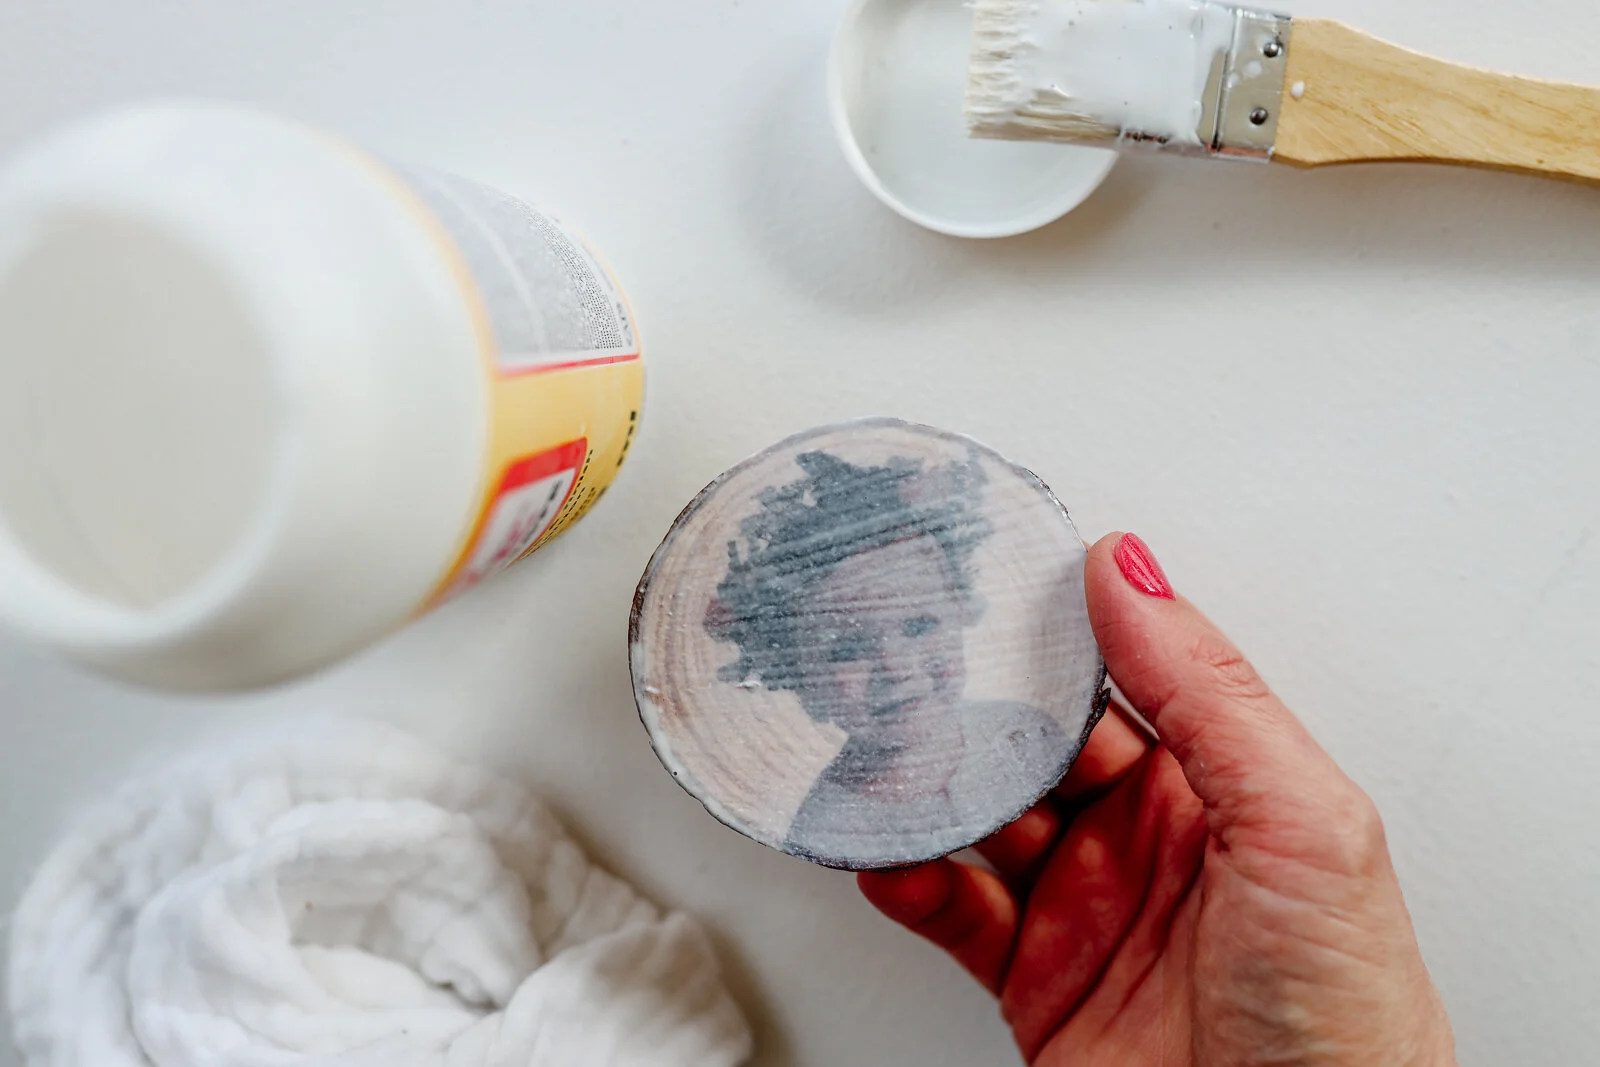
Footstep Six
Once you're happy with the terminate, paint a thin layer of Mod Podge over the top of the image. This acts like a seal and gives it a nice finished wait. Look for it to dry, and you're done!

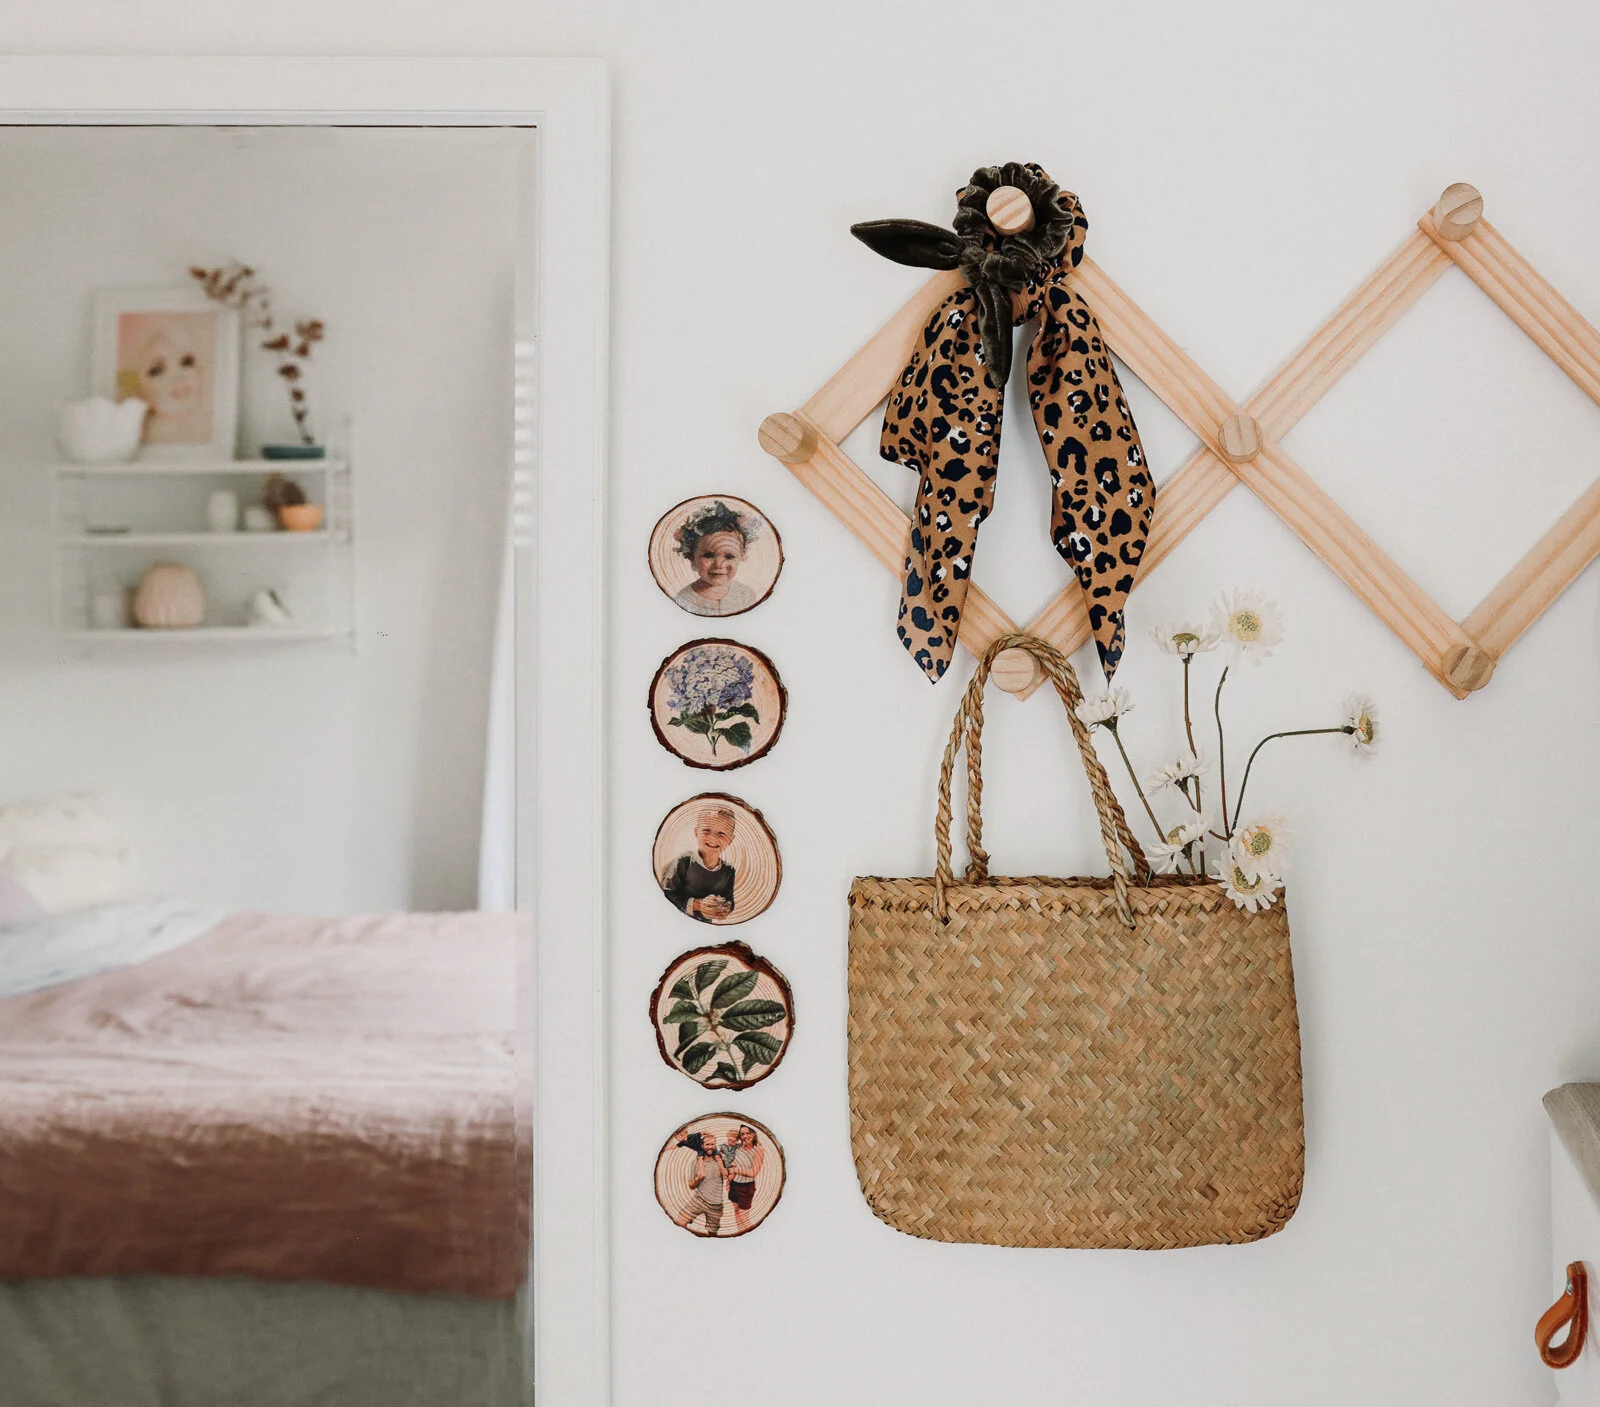
What do you think? Ready to requite it a go? I honey how this project creates a lovely photograph display, merely it's too quite a fun process along the fashion.
There are lots of means y'all can display these piffling photo rounds, and I've given you some ideas below. They even make cute coasters (helloooo Christmas gift for the Grandparents).


How To Transfer A Photo To Wood,
Source: https://www.cleverpoppy.nz/blog/how-to-transfer-photos-onto-wood
Posted by: hallstee1998.blogspot.com
0 Response to "How To Transfer A Photo To Wood"
Post a Comment